Συχνές Ερωτήσεις
Γενικές ερωτήσεις
Yes. The Accu-Chek Aviva Nano systems are cleared to test fresh capillary, whole blood venous, arterial, and neonatal blood samples.
Only 3 other substances in the bloodstream (galactose, Lipaemic samples (triglycerides) and ascorbic acid) can interfere with the Accu-Chek Aviva test strip
Because your monitor and lab tests don't measure the same thing, these numbers are likely to vary. Lab tests generally test plasma, but a meter uses whole blood. As a result, even if you take both tests at the exact same time, your meter is likely to show a lower number than the lab results. This is perfectly acceptable, and your healthcare professional will already be factoring this in.
Roche goes above and beyond to deliver safe, accurate and dependable products.
For every lot of Accu-Chek test strips, containing millions of strips, one out of every 100 vials is tested for consistency of performance. Vials representative of the entire lot are tested a second time, some in a lab setting and others with blood from actual people with diabetes to reflect a real-world environment. As a result of our quality assurance process, we won’t release affected test strips when any of the samples show a reading outside our accepted limits.
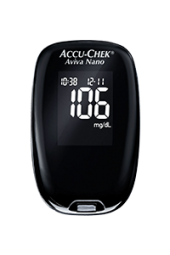
Special Features
The meter is compatible with all Accu-Chek data management tools, including the Accu-Chek 360° diabetes management system and the Accu-Chek Connect Online portal.
You can transfer stored results to a computer simply by pointing the infrared (IR) window on top of the meter toward the IR window of the Accu-Chek download cable. The 2 windows should be 3 to 10 cm (1 to 4 inches) apart. To enter download mode:
1. Turn off the meter.
2. Press and hold the left and right arrows until 2 arrows in the display flash alternately. Initiate the data download by following the instructions provided with the supported software.
Once set, test reminders will beep every 2 minutes up to 3 times. It will turn off when you insert a test strip or press any button. To turn the beeper off all the way, refer to the set-up instructions in your User Manual.
You can set up to 4 test reminders per day, in 15-minute increments. At the set reminder time(s), a series of beeps will sound every 2 minutes, up to 3 times per reminder. The reminder beep will not occur if the meter is on at the set time, or if you run a test within 15 minutes of the set reminder time. If you turn on the meter while the reminder is sounding, the series of beeps for that reminder will stop.
Marking results with a pre-meal or post-meal marker can provide more information about how food affects your blood sugar, to aid in managing your numbers. You can also use a general marker to identify an alternate site test or post-exercise result. When you review the results in memory, these markers can help you remember what was different about the result. To use a marker:
- When you perform a test you want to mark, do not remove the test strip.
- Press and release the right arrow key to toggle through the marker options. When you mark a pre-meal result, you can opt for a post-meal test reminder. The meter can beep 1 or 2 hours after you test to remind you—choose your preference in the set-up mode.
- When the marker you want to use appears, remove the test strip from the meter.
Refer to your User Manual for more details.
The display turns on automatically when is pressed or a test strip is inserted in the meter. The backlight and meter automatically turn off within 5 seconds after the test strip is removed from the meter, and the meter automatically powers off after 2 minutes of nonuse.
Φροντίδα του Mετρητή και Mπαταρία
Visit your meter's Screen Messages page for a list of messages and definitions or download the User Manual for your meter.
Be sure to clean the areas around slots and openings, while being careful not to get any moisture in them. You should also wipe down the entire meter surface, including the meter display.
- 70% isopropyl alcohol
- Mild dishwashing liquid mixed with water
- 10% household bleach solution (1 part bleach plus 9 parts water) made the same day
Cleaning is simply removing dirt from the meter, while disinfecting refers to removal of most but not all, disease-causing and other types of microorganisms.
Clean and disinfect your meter once a week, or any time blood gets on the meter. You should also clean the meter before allowing anyone else to handle it.
Some countries share meter configurations with other countries, have multiple time zones within their country, and/or change their time semi-annually. Therefore, manufacturing is unable to set the correct time for every country.
The system directs you to confirm the time and date the first time you turn it on, and the default time should be within 1–2 hours of your correct time.
An additional internal battery supports the clock when the main battery is removed. You can leave the battery out of the meter for up to 72 hours and still retain the time and date. If you replace the battery within that time, the meter will ask you to verify the time and date the next time you turn it on.
When you replace the main battery, the internal battery will automatically recharge. If you do not replace the battery within 72hours, the meter will retain the time and date that was stored immediately before the internal battery was depleted.
The meter includes an additional internal battery that retains the time and date while you change batteries. However, you'll still want to confirm that the time and date are correct.
The meter uses 2 3-volt lithium coin cell batteries (type CR 2032) found in many stores.
Your meter comes with the batteries already installed and a preset time and date. You may need to change the time to match your time zone or, if you live in a state that observes daylight saving time, to reflect the time change.
- Press and release the On/Off button to turn the meter on. The flashing test strip symbol appears.
- Press and hold the On/Off button again until "set-up" appears in the display.
- Press and release the arrows to decrease or increase the hour.
- Press and release the On/Off button to set the hour. The minutes flash.
- Repeat steps 3 and 4 to set the minutes, AM/PM, month, day and year. The flashing field is the one you are changing.
- Once you set the correct time and date, press and hold the On/Off button until the flashing test strip symbol appears.
Ταινίες μέτρησης και Μετρήσεις ελέγχου
Control test values do not stay in the memory that you can access on the meter. Instead, the meter stores them in the downloadable memory, so you can view them with supported software.
If the control solution evaporates or concentrates on the tip of the bottle, it could cause the meter to display an incorrect control reading.
The Accu-Chek Aviva Nano blood glucose meter automatically recognizes Accu-Chek Aviva control solutions, so running a control test is easier than ever. First, wipe the tip of the control bottle. Then put the meter on a flat surface, insert the test strip, and squeeze a drop of the control solution onto the front edge of the test strip. A result appears with a flashing “L”. Press one of the arrow keys once to indicate a Level 1 control test or twice to indicate Level 2. Press the ON/OFF button to set the level in the meter. The control result and “OK” alternate in the display if the result is in range.
A control test using your meter's specific control solution ensures that the meter and test strips are working properly. Testing with control solution is just like a blood sugar test, except you fill the window on the test strip with a drop of control solution instead of blood.
No. Although you can insert a code (activation) chip from another meter into the Accu-Chek Aviva Nano blood glucose meter, you will get an E-2 error message.
Testing Blood Sugar
The Accu-Chek lancing device has a special AST cap designed for alternate site testing. Talk with your healthcare professional before deciding if alternate site testing is right for you. Note: Do not use the AST cap when testing at the fingertip. Follow the steps for fingertip testing, with a few differences:
- Attach the AST cap to the lancing device
- Twist the comfort dial until you reach your chosen depth setting. You may need a deeper setting—try 3 for testing on your palm. (This is a suggested setting. Yours may differ.)
- Prime the lancing device, and place the AST cap firmly against the selected site.
- Press the release button to lance, as usual.
For complete details about where and how to test on your palm, refer to your Alternate Site instructions for use.
The Accu-Chek Aviva Nano blood glucose meter will test blood samples from 3 alternate sites (called Alternate Site Testing, AST): forearm, palm, and upper arm.
The system automatically detects when enough blood has been applied to the test strip and begins the test, even if some yellow is still visible. The only time you need to apply more blood is when the blood drop symbol continues to flash in the display.
It's a small sample—just 0.6 microliter.
There are a few ways you can improve blood flow and make blood sugar testing easier: Warm your fingers by washing with warm, soapy water, then rinse and dry completely. Let your arm hang down at your side to increase blood flow to the fingertips. Grasp finger just below the joint closest to the fingertip and massage gently toward tip of finger, then squeeze for 3 seconds. Use an Accu-Chek lancing device set to the right penetration depth for your skin type. Refer to your User's Guide for additional information.